
Quick and Easy Guide to Adding Drums to Your Song
Quick and Easy Guide to Adding Drums to Your Song
Are you ready to take your music production to the next level? Adding drums to your track doesn’t have to be complicated or time-consuming. In this guide, we’ll walk you through a simple and efficient way to create a drum beat for your song using free samples and basic tools. Whether you're a beginner or just looking for a streamlined workflow, we've got you covered. Lets dive in!
Step 1: Find and Prepare Your Drum Samples
The first step to building your beat is finding drum samples. Fortunately, there are countless free drum samples available online—just a quick search away! Download a few samples, such as a kick, snare, and hi-hat, to get started.
FREE SAMPLES HERE: https://pixabay.com/sound-effects/search/kick%20drum/
Just search for drum you are looking for - example: type snare drum in search box
Video on how to add samples here: https://www.youtube.com/watch?v=m80FA4q1GJU
Once you have your samples ready, bring them closer to your workspace. In your DAW (Digital Audio Workstation), locate the tracks view. If you can’t see it, look for a small arrow at the bottom left of your screen. Click it to expand the view and resize it as needed for better visibility.
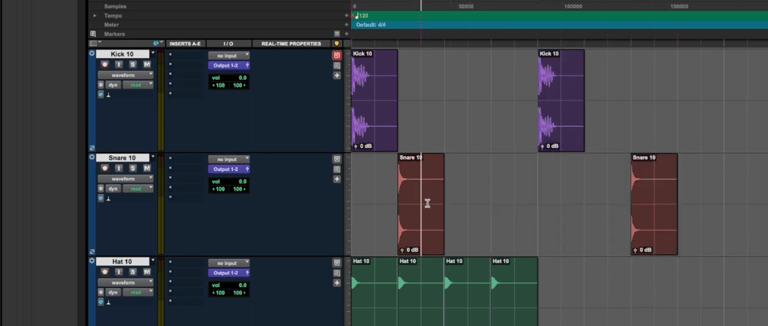
Step 2: Drag and Drop Your Samples
With your samples selected, simply drag and drop them into the tracks area of your DAW. Don’t worry—your software will automatically create a track for each sample. Use keyboard shortcuts like ‘T’ to zoom in and ‘E’ to adjust the track size for easy navigation.
For example, drag your kick drum sample to create a kick track. Repeat the process for your snare and hi-hat samples. Before you know it, you’ll have all three tracks ready to work with!
Step 3: Set Your Tempo and Grid Mode
Now it’s time to set the foundation of your beat. Start by choosing your track’s tempo—120 BPM is a good default if you’re unsure. Next, switch your DAW to grid mode. This ensures your beats align perfectly, making it easier to create a polished rhythm.
Adjust the grid to eighth notes for more detailed placement. You’ll notice additional lines appearing on your screen, providing the structure you need for precise editing. Grid mode is your best friend for keeping your beat organized!
Step 4: Build Your Basic Beat
Here comes the creative part: building your drum beat! Start with your kick drum. Place it on beats 1 and 3 of each measure. Use Cmd + D (or Ctrl + D on PC) to duplicate the kick drum to additional measures.
Next, add the snare drum on beats 2 and 4. To make a copy of the snare, hold Option (or Alt) while dragging it to the desired position. Thanks to grid mode, the snare will automatically snap into place.
Finally, add the hi-hat. You can place it on quarter notes or eighth notes, depending on the rhythm you want. Highlight all the hi-hats, and use Cmd + D to duplicate them across multiple measures for consistency.
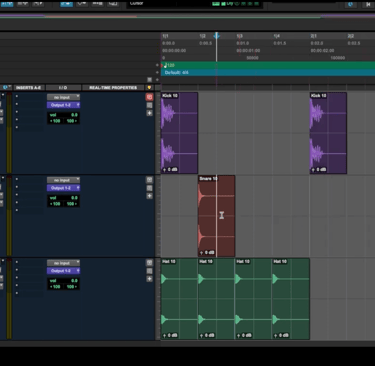
Step 5: Extend Your Beat
A two-bar loop isn’t enough for a full song. To extend your beat, highlight your drum patterns and use the repeat function (Option + R or Alt + R). Enter the number of repetitions you want—50, for example—and watch your beat stretch into a full-length track in seconds!
This method is not only fast but also ensures your beat remains seamless across the entire song. You’re now set with a solid drum foundation for your track.
Pro Tip: Choose Your Tempo Wisely
Always set your desired tempo before building your beat. Changing the tempo later can cause the drums to fall out of sync with the rest of your song, which requires additional fixes. Save yourself time by starting with the correct tempo!
Experiment and Make It Your Own
While this guide focuses on creating a basic beat, feel free to experiment with different tempos, note values, and patterns. You can try sixteenth notes for a faster rhythm or mix in additional percussion sounds to add variety.
The key is to keep practicing and refining your skills until you find your unique groove!
Conclusion: Start Creating Your Beats Today!
Adding drums to your songs has never been easier. By following this step-by-step guide, you’ll be able to create professional-sounding beats in no time. From finding free samples to building and extending your patterns, this process provides the foundation to bring your tracks to life.
What kind of beat will you create today? 🎶 Let us know in the comments, and don’t forget to share your creations! If you’re hungry for more tips and tutorials on music production, stay tuned for our next post. Until then, happy producing!