
Master the Art of Tempo Changes in Your Click Track
Master the Art of Tempo Changes in Your Click Track
Master the Art of Tempo Changes in Your Click Track 🎶
Ever wondered how to create a seamless click track with tempo changes that perfectly matches your song's rhythm? Whether you're a seasoned producer or just starting your music production journey, mastering tempo maps can elevate your recording game. In this post, you'll learn a simple, step-by-step method to make your click track follow your song across tempo changes. Let’s dive in! 🚀
Why Tempo Maps Matter
A click track is essential for keeping musicians in sync during recording sessions. But what happens when your song includes tempo changes? Manually adjusting the click track can be tedious, but with a tempo map, you can automate the process effortlessly. A tempo map allows your click track to adapt to your music's varying speeds, ensuring a smooth and professional sound.
Step-by-Step Guide to Creating a Tempo Map
Setting up a tempo map might sound complicated, but it’s easier than you think. Follow these steps to create a click track that dynamically adjusts to your song:
Create Your Click Track: Start by navigating to the "Track" menu and selecting "Create Click Track." This will automatically generate a click track for you.
Adjust the Time Signature: If needed, open the click track plugin and modify the time signature to fit your song.
Enable Conductor Mode: Make sure the conductor mode is enabled (look for the blue icon). This is crucial for making tempo adjustments.
Switch to Grid Mode: Grid mode helps you visualize your song in bars and beats, making it easier to align tempo changes.
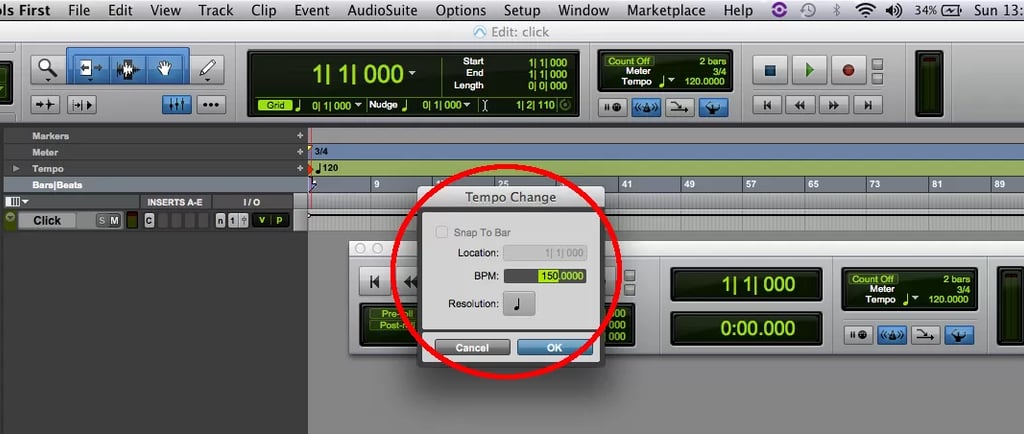
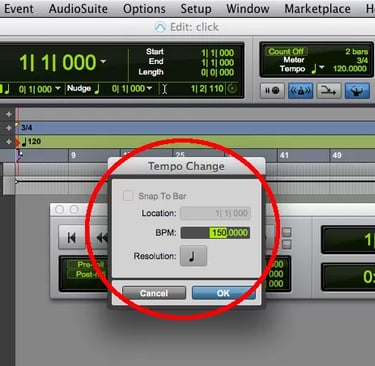
Add Tempo Markers: Place your cursor at the desired point for a tempo change, click the "plus" button, and input the new tempo. Repeat this step for each tempo variation in your song.
And there you have it! You now have a click track that transitions seamlessly across tempo changes, perfectly aligned with your song’s structure.
Bonus Tip: Visualizing and Editing Your Tempo Map
Want to tweak your tempo map further? Open the tempo map view by clicking the small arrow in your toolbar. This allows you to see all tempo markers and adjust them by dragging or inputting new values. For example, you can increase the tempo to 266 beats per minute or revert to your original setting with just a few clicks. The flexibility is endless, giving you complete control over your track.
watch video here: https://youtu.be/j7secFM83DM
Key Benefits of Using Tempo Maps
Still wondering why you should use tempo maps? Here are the top benefits:
Improves synchronization between instruments and recordings.
Saves time during editing and mixing sessions.
Enhances the professional quality of your productions.
Provides flexibility to experiment with different tempos effortlessly.
Take Your Music Production to the Next Level
Implementing tempo maps in your workflow isn’t just a technical skill—it’s a creative tool that empowers you to bring your musical ideas to life. Whether you’re working on a simple demo or a full-fledged album, a well-crafted click track with tempo changes ensures a polished and cohesive result. So, what are you waiting for? Start experimenting with tempo maps today and elevate your sound! 🌟
Have you tried creating tempo maps in your projects? Share your experiences or tips in the comments below! And if you found this guide helpful, don’t forget to share it with your fellow music enthusiasts. Let’s keep the creativity flowing! 🎵