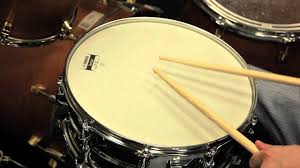
HOW TO TRANSFORM YOUR SNARE DRUM WITHOUT EQ OR PLUGINS 🎼
Blog post HOW TO TRANSFORM YOUR SNARE DRUM WITHOUT EQ OR PLUGINS 🎼 .


My post content
Ever found yourself stuck with a snare drum that just doesn’t cut it? You’re not alone! Many home studio enthusiasts and music producers face this challenge. But here’s the good news: you can breathe new life into your snare without using expensive plugins, EQ, or complex tools. In this guide, I’ll break down a simple, free method to enhance your snare sound using drum samples. Let’s dive in! 🎶
Why Your Snare Might Need a Boost
A flat, uninspiring snare drum can drag down your entire mix. When the snare lacks life, it struggles to cut through the instrumentation, leaving your track sounding dull. This is where adding drum samples can work wonders. By layering samples over your original snare, you can add character, punch, or depth—all tailored to your musical style.
Step 1: Find Free Snare Drum Samples
The first step is finding the right snare drum samples to complement your mix. Luckily, there are plenty of websites offering free drum samples. One such resource is Soundcamp, but a quick search online will lead you to many others. Once you’ve downloaded your samples, you’re ready to integrate them into your project.
Step 2: Import Samples into Your DAW (Pro Tools Example)
Bringing your samples into your DAW is straightforward. In Pro Tools, you can use the following steps:
- Open the “Tracks” window by clicking on the small arrow at the bottom of your screen.
- Drag and drop your sample files into this window. You’ll see them appear in the track list, highlighted in blue.
- Preview the samples to select the one that fits your needs. For instance, a “sizzle rock” sample might add brightness, while a “reverb rock” sample introduces depth.
🎯 Pro Tip: Experiment with different samples to find one that complements the original snare. If your snare needs more crack, choose a brighter sample. For more low-end, pick a heavier, deeper sample.
Watch video here: https://youtu.be/VWBGx4b60mc
Step 3: The Old-School Way to Layer Samples
If you don’t have drum replacement plugins or MIDI tools, don’t worry! There’s an old-school, manual method that’s free and just as effective:
- Select your sample using the hand or smart tool in Pro Tools.
- Copy the sample by pressing Command + C (or Ctrl + C on PC).
- Navigate to your snare track and enable “Tab to Transients” in your DAW. This helps pinpoint the start of each snare hit.
- Use the Tab key to jump to a snare hit, press the semicolon key to move to the track below, and paste the sample with Command + V (or Ctrl + V).
- Repeat this process for each snare hit in your track.
This method may sound tedious, but once you get into a rhythm, it becomes quick and efficient. And the results? Totally worth it! 🌟
Step 4: Blend Your Samples
With your samples lined up, it’s time to balance the volume and blend them with the original snare. Pull down the sample faders and gradually mix them in. Don’t be afraid to experiment! Each sample adds a unique flavor, and combining multiple samples can create a fuller, richer sound.
For instance:
- A darker sample with a reverb tail can add atmosphere and depth.
- A brighter, airy sample can add crispness and energy.
Watch video here: https://youtu.be/VWBGx4b60mc
Listen to the snare in the context of your full mix, including bass and guitars. In many cases, the reverb or extra elements in your sample will blend seamlessly, adding life without overpowering the track.
Step 5: Experiment and Elevate Your Sound
Don’t stop at one sample! Layering multiple samples can open up endless possibilities. For example, pair a “crack” sample with a “body” sample to achieve both punch and depth. Adjust the mix levels and test different combinations until you find the perfect fit for your track.
🎯 Pro Tip: Listen to tracks you love and analyze their snare sounds. Use this as inspiration to find or create samples that replicate those qualities.
The Before and After: Hear the Difference
Once you’ve finished layering your samples and dialed in the perfect blend, the transformation will amaze you. Comparing the original snare to the enhanced version, you’ll notice a world of difference: a fuller, livelier, and more professional drum sound that cuts through the mix like a dream.
Final Thoughts: Enhance Your Snare, Elevate Your Mix
There you have it—a simple, free, and effective way to make your snare drum sound amazing without EQ, compression, or plugins. This technique is perfect for beginners and home studio enthusiasts who want to maximize their sound without breaking the bank. Remember, the key is experimentation. Try different samples, blend them creatively, and let your ears guide you.
🎯 What’s next? Give this technique a try and let me know how it works for you! Have tips or tricks of your own? Share them in the comments below. And if you found this guide helpful, don’t forget to share it with your fellow music producers. Let’s make great music together! 🎵
